この記事について
本記事は、2023年5月に社内で実施した勉強会の資料を基に、社外向けに再編集したものです。
記載の情報は執筆当時のものであり、最新の仕様やベストプラクティスとは異なる可能性があります。
実装にあたっては、必ず最新の公式ドキュメントをご確認ください。
きっかけ
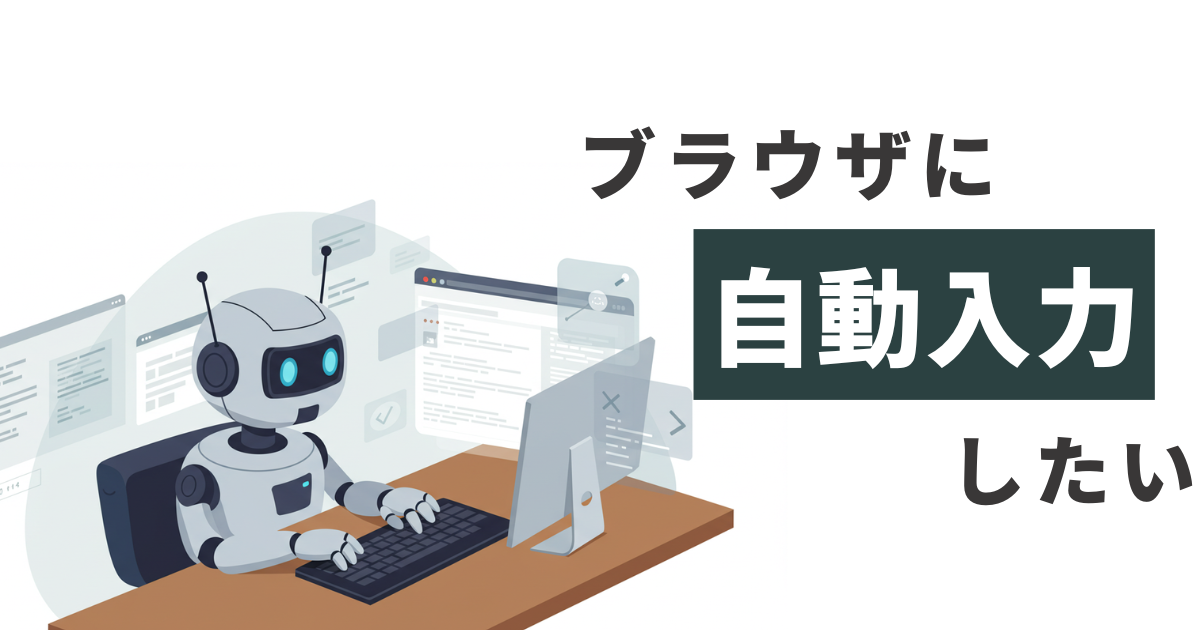
長文入力が必要な場面で、コピペではなくワンクリックで入力できると便利だと考えたことをきっかけに、Chrome拡張機能とSeleniumを用いて試作を行いました。
マクロなどを利用すれば、より簡易的に実現できる方法もあるかもしれません。
概要
- Chrome拡張を用いて自動入力を実装
- Seleniumを用いて自動入力を実装
Chrome拡張
Chrome拡張の基本
参考:Hello World 拡張機能 | Chrome Extensions | Chrome for Developers
https://developer.chrome.com/docs/extensions/get-started/tutorial/hello-world?hl=ja
1.超基本
a. 拡張機能用のフォルダを作成する
b. a.で作成したフォルダにmanifest.jsonを作成
chrome拡張の設定ファイルであり、必要な権限や読み込むファイルを記載する
{
  "name": "Hello World",
  "version": "1.0",
  "manifest_version": 3,
  "action": {
      "default_popup": "popup.html"
  }
}
c. a.で作成したフォルダにmanifest.jsonのdefault_popupで指定したファイルを作成
<html>
<body>
<h1>Hello World</h1>
</body>
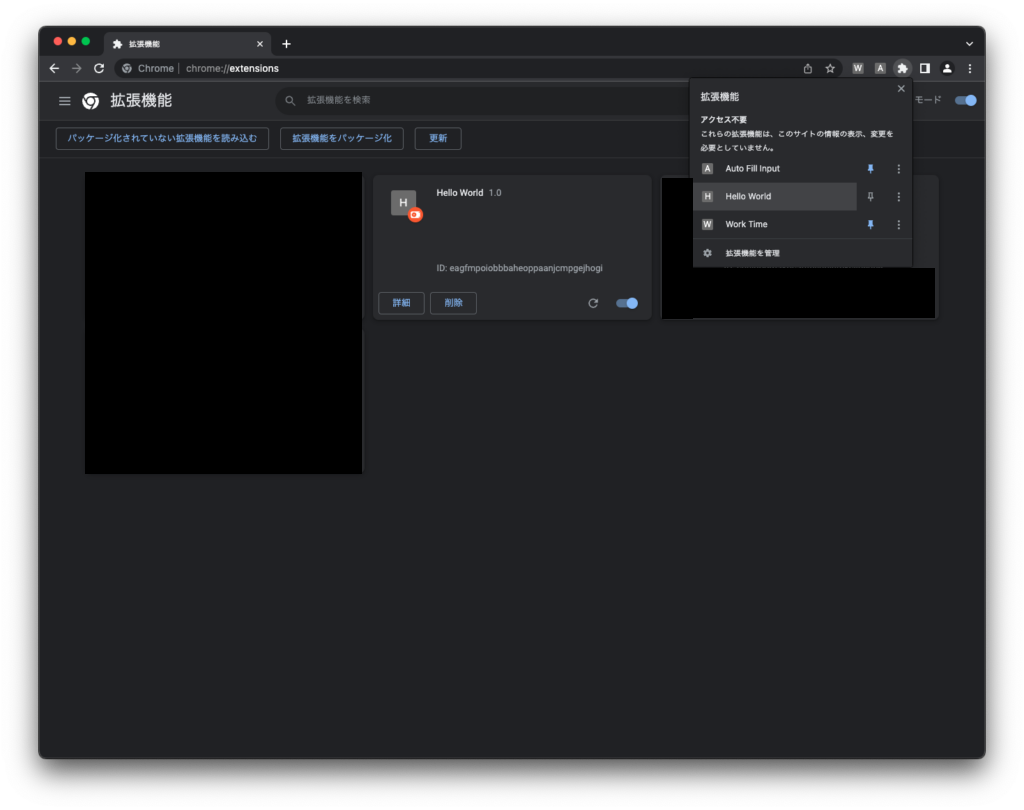
</html>d. chromeの拡張機能でディベロッパーモードを有効にして読み込む
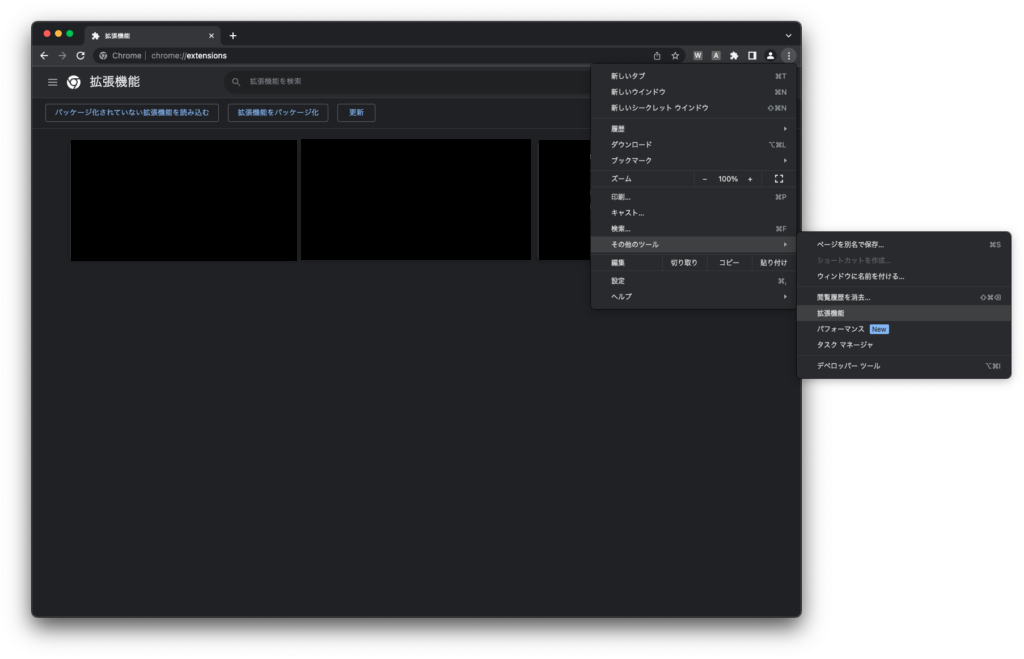
画面右上のディベロッパーモードを有効にして、「パッケージ化されていない拡張機能を読み込む」から、a.で作成したフォルダを読み込む
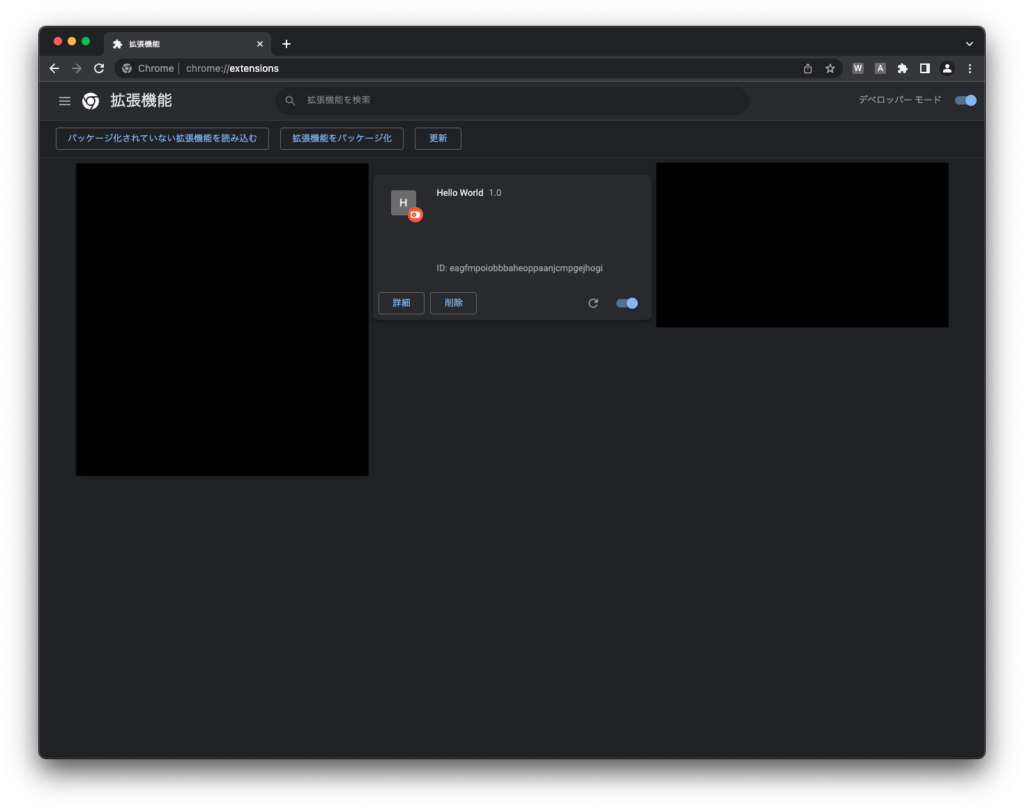
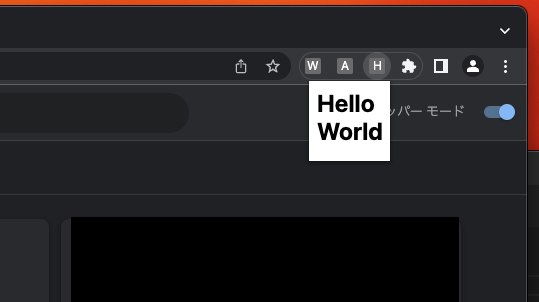
e. 右上のパズルピースから読み込んだ拡張機能を選択するとポップアップが表示される
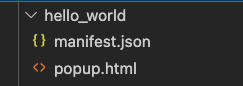
f. 最終的なフォルダ構成
2.開いているタブページ内でjavascriptを実行する
参考:chrome.scripting | API | Chrome for Developers
https://developer.chrome.com/docs/extensions/reference/api/scripting?hl=ja#handle_the_results
参考:chrome.tabs | API | Chrome for Developers
https://developer.chrome.com/docs/extensions/reference/api/tabs?hl=ja#get_the_current_tab
a. manifest.json
permissionsを追加。ここに拡張機能へ付与する権限を記載する。
{
  "name": "Get Title",
  "version": "1.0",
  "manifest_version": 3,
  "permissions": [
    "scripting",
    "activeTab"
  ],
  "action": {
      "default_popup": "popup.html"
  }
}
b. popup.html
htmlなので、ボタンの配置や、javascriptをファイルから読み込むこともできる
<html>
  <head>
    <meta charset="UTF-8">
    <style>
      body {
        padding: 5px;
        width: 100px;
      }
    </style>
  </head>
  <body>
    <h1>タイトル</h1>
    <h2 id="result"></h2>
    <button>取得する</button>
    <script src="popup.js"></script>
  </body>
</html>
c. popup.js
ブラウザ操作用に多様なAPIが用意されているため、それらを活用
async function main() {
  // 開いているタブを取得
  const [tab] = await chrome.tabs.query({active: true, currentWindow: true});
  // 取得したタブでjavascript実行
  chrome.scripting.executeScript({
    target: {tabId: tab.id},
    func: getTitle
  }).then(function (r) {
    document.getElementById("result").innerHTML = r[0].result;
  });
}

// getTitleは拡張機能上ではなく現在開いているタブ上で実行される
function getTitle() {
  return document.title;
}

// ここのdocumentとgetTitleのdocumentは対象が違うため注意
// ここのdocumentは拡張機能のポップアップのdocument
document.querySelector("button").addEventListener("click", main);
なお、直接開いているページにjavascriptを埋め込むこともできます
参考:コンテンツ スクリプト | Chrome Extensions | Chrome for Developers
https://developer.chrome.com/docs/extensions/develop/concepts/content-scripts?hl=ja
3.メッセージパッシング
Chrome拡張機能では、Webページと拡張機能間で情報をやり取りすることができます。この情報交換の方法の1つがメッセージパッシングです。
メッセージパッシングは、拡張機能内でのスクリプトとWebページ内でのスクリプト間で直接通信することができないため、両者を接続するための中継方法として使用されます。メッセージパッシングを使用することで、拡張機能内で実行されるJavaScriptコードが、Webページ内のJavaScriptコードに指示を送信したり、Webページ内のJavaScriptコードが拡張機能内で実行されるJavaScriptコードに指示を送信したりすることができます。
chatGPTからの回答
今回のように単純なJavaScriptの実行であれば不要ですが、より複雑な拡張機能を実装する場合必須な機能になると思います
参考:chrome.runtime | API | Chrome for Developers
https://developer.chrome.com/docs/extensions/reference/api/runtime?hl=ja#concepts
// 拡張機能からはsendMessageを発行する
chrome.runtime.sendMessage({message: "hello"}, function(response) {
  console.log(response);
});
// メッセージの受け取り側(他の拡張機能やブラウザのjavascript)でonMessage.addListenerを定義しておく
chrome.runtime.onMessage.addListener(function(request, sender, sendResponse) {
if (request.message === "hello") {
sendResponse({message: "こんにちは"});
}
});selenium
Seleniumとは、Webブラウザ自動化のためのツールです。ブラウザを自動的に操作することで、Webアプリケーションのテストやスクレイピングなどを行うことができます。Pythonなどのプログラミング言語から操作することができるため、自動化の幅が広がります。ただし、ブラウザのバージョンやWebアプリケーションの変更によって、スクリプトの修正が必要になることもあるため、注意が必要です。
Notion AIからの回答
出典:Selenium公式
https://www.selenium.dev
gemのインストール
- selenium-webdriver
selenium本体
gem install selenium-webdriver -v 3.142.2 出典:selenium-webdriver | RubyGems.org | コミュニティのgemホスティングサービス
https://rubygems.org/gems/selenium-webdriver/versions/3.142.2?locale=ja
- webdrivers
Seleniumを動作させるには、各ブラウザの本体とドライバーを別途インストールする必要があります。
ただし、両者のバージョンが一致していないと正しく動作しないため、自動的にバージョンを調整してくれるgemを利用すると便利です。
gem install webdrivers -v 3.3.1インストール後は、以下のようにrequireで利用できます。
require "selenium-webdriver"
require "webdrivers/chromedriver"
基本的な使い方
- ブラウザの起動
driver = Selenium::WebDriver.for :chrome- 指定したURLへ遷移
driver.get "http://localhost:3100/login"- HTML要素の取得
driver.find_element(:id, "id")
driver.find_element(:name, "name")
driver.find_element(:class, "class")
driver.find_element(:xpath, "xpath")

# 複数取得する
driver.find_elements(:xpath, "xpath")- 属性の取得
element = driver.find_element(:id, "id")
# name属性を取得
element.attribute("name")- フィールドに入力
element = driver.find_element(:id, "id")
# keywordを入力(キーボード入力扱いなのでフォームの入力制限の影響を受ける)
element.send_keys("keyword")- フォーム送信
form = driver.find_element(:id, "form")
form.submit
起動済みのブラウザにアタッチしたい場合
ブラウザを新規に起動する場合、ログインが必要なWebページではログイン処理を追加で実装する必要があり、手間が増えることがあります。
一方、Google Chromeにはリモートデバッグ機能があり、それを利用することで既に起動しているブラウザへ接続することが可能です。
- ポートを指定して起動(Mac)
/Applications/Google Chrome.app/Contents/MacOS/Google Chrome --remote-debugging-port=9222- オプションを指定してweb driverの起動
options = Selenium::WebDriver::Chrome::Options.new
options.add_option("debuggerAddress", "127.0.0.1:9222")

driver = Selenium::WebDriver.for :chrome, options: options
今回試作したコード(一部抜粋)
※本記事作成にあたって一部を抜粋していますのでそのままでは動作しない可能性がある点ご注意ください
- chrome拡張
popup.js
id=”exec”のボタン押下で自動入力を実行する
document.getElementById("exec").addEventListener("click", async function() {
  // 開いているタブを取得
  const [tab] = await chrome.tabs.query({active: true, currentWindow: true});
  // 取得したタブにメッセージ送信
  chrome.tabs.sendMessage(tab.id, { profile: { text: { enable: true }, textarea: { enable: true } } });
});
content_script.js
開いているページに自動入力の定義を行ったスクリプトを埋め込む
const getRandomStr = function (length, insertNewLine) {
  const chars = 'あいうえおアイウエオ亜伊右絵尾ABCDEFGHIJKLMNOPQRSTUVWXYZabcdefghijklmnopqrstuvwxyz0123456789!"#$%&\'()=~|';
  let randStr = '';
  for (let i = 0; i < length; i++) {
    randStr += chars.charAt(Math.floor(Math.random() * chars.length));
    if (insertNewLine && (i + 1) % 100 == 0) randStr += "\r\n";
  }
  return randStr;
}

const fillInput = async function (profile) {
  if (profile.text.enable) {
    const texts = document.querySelectorAll("input");
    const now = moment();
    Array.from(texts).forEach((e) => {
      if (e.type == "text" && e.classList.contains("datepicker")) {
        // active admin の datepicker
        now.add(1, "days");
        e.value = now.format("YYYY/MM/DD");
      } else if (e.type == "text") {
        const length = (e.maxLength != -1) ? e.maxLength : 255;
        e.value = getRandomStr(length);
      } else if (e.type == "tel") {
        e.value = "00000000000";
      } else if (e.type == "email") {
        e.value = "example@example.com";
      } else if (e.type == "number") {
        const min = e.min ? e.min : 0;
        const max = e.max ? e.max : 2147483647;
        e.value = Math.floor(Math.random() * (max - min) + min);
      } else if (e.type == "time") {
        now.add(1, "minutes");
        e.value = now.format("HH:mm");
      } else if (e.type == "password") {
        e.value = "password";
      } else if (e.type == "datetime-local") {
        now.add(1, "minutes");
        e.value = now.format("YYYY-MM-DDTHH:mm");
      }
      e.dispatchEvent(new Event("change"));
    });
  }

  if (profile.textarea.enable) {
    const textAreas = document.querySelectorAll("textarea");
    Array.from(textAreas).forEach((e) => {
      const length = (e.maxLength != -1) ? e.maxLength : 2000;
      e.value = getRandomStr(length, true);
      e.dispatchEvent(new Event("change"));
    });
  }
}

chrome.runtime.onMessage.addListener(function (request, sender, sendResponse) {
  if (request === null || typeof request !== "object") return true;
  if (Object.keys(request).indexOf("profile") == -1) return true;

  fillInput(request.profile);
});- selenium
require "selenium-webdriver"
require "webdrivers/chromedriver"

def getRamdomStr(length, insert_new_line=false)
    chars = 'あいうえおアイウエオ亜伊右絵尾ABCDEFGHIJKLMNOPQRSTUVWXYZabcdefghijklmnopqrstuvwxyz0123456789!"#$%&'()=~|'
    str = ""
    length.times do |i|
        str.concat(chars.chars.sample)
        str.concat("n") if insert_new_line && (i + 1) % 100 == 0
    end
    str
end

driver = Selenium::WebDriver.for :chrome
driver.get "http://localhost:3100/login"

# ログイン
driver.find_element(:id, "admin_user_email").send_keys("admin@example.com")
driver.find_element(:id, "admin_user_password").send_keys("password")
driver.find_element(:id, "session_new").submit

driver.get "http://localhost:3100/posts/new"
elements = driver.find_elements(:xpath, "//input[@type='text']")
elements.each do |elem|
    length = elem.attribute("maxlength").to_i
    length = 10 if length == 0
    elem.send_keys(getRamdomStr(length))
end
elements = driver.find_elements(:xpath, "//textarea")
elements.each do |elem|
    length = elem.attribute("maxlength").to_i
    length = 300 if length == 0
    elem.send_keys(getRamdomStr(length, true))
end

puts "キーを入力して終了"
gets
driver.quit


管理-300x158.png)